I’ve been getting a lot of questions about content (mainly video) recently – probably because I’ve been encouraging people to use video more and more since the social networks are making video more popular than ever. So I wanted to show you how to make a simple movie or video using the iPhone 6 iMovie App.
This is mainly just images but I thought that would be the easily way to show you how to do it. And I like “How To” article that are mainly pics and just a bit of text.
With this article I’ll be building a quick tutorial on doing a “talking head” video with added B-roll and photos. It’s not as hard as it looks and the software is very forgiving so why don’t you give it a try! The video is above.
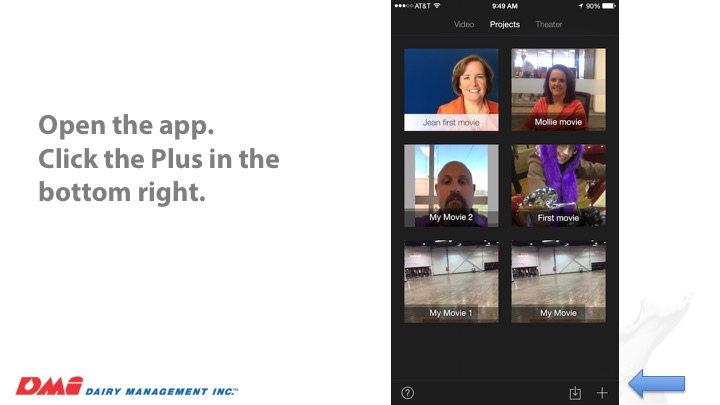
Open the app. Click the Plus on the bottom right.
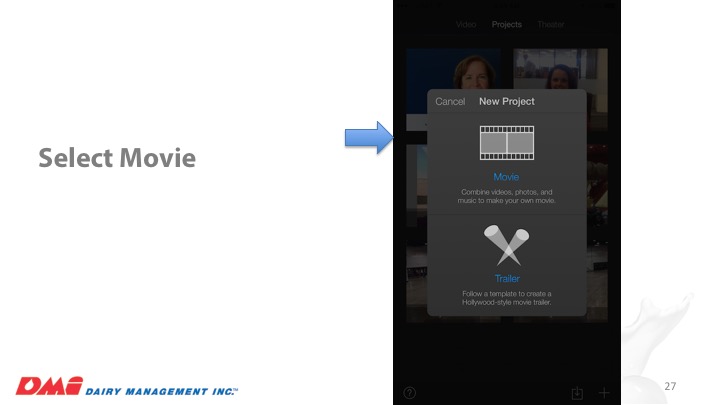
Select Movie instead of Trailer. Trailer adds movie trailer like sequences to your iMovie. Sometimes this is a lot of fun.
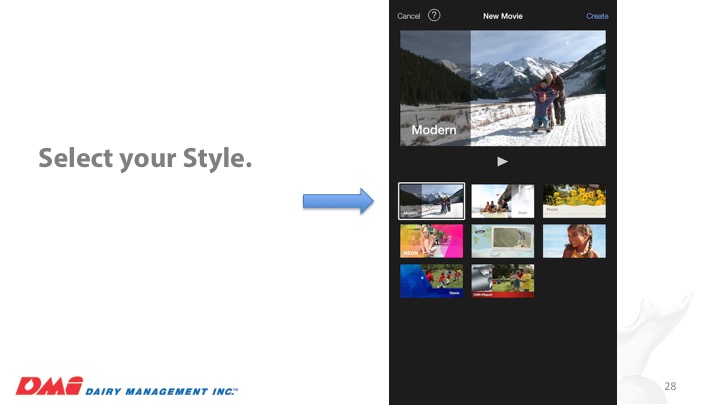
Select Your Style. I like Modern.
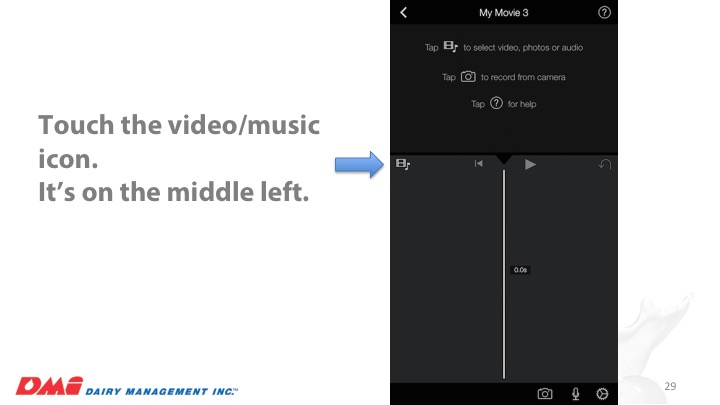
Touch the video/music icon on the middle left.
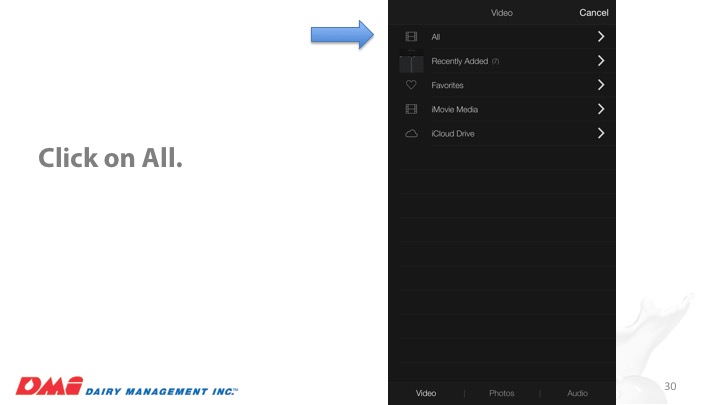
Click all to see your movies.
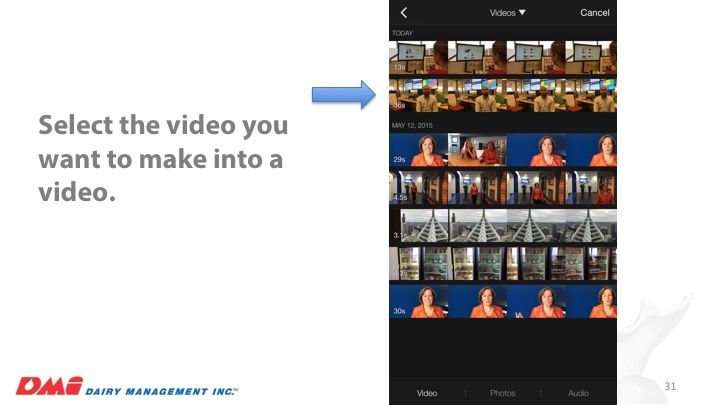
Select the video you want to edit.
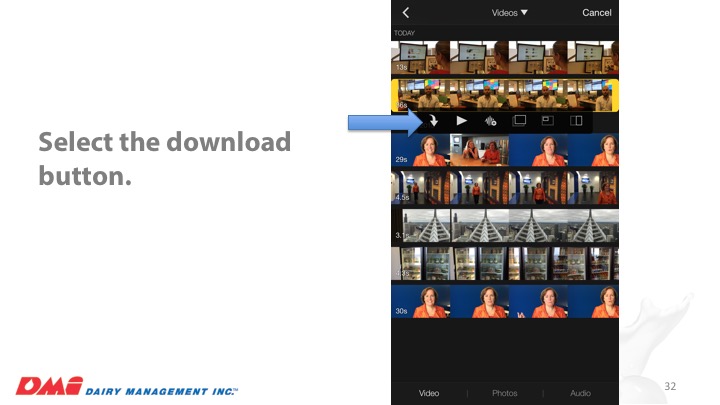
Select the download button to get it into the iMovie program.
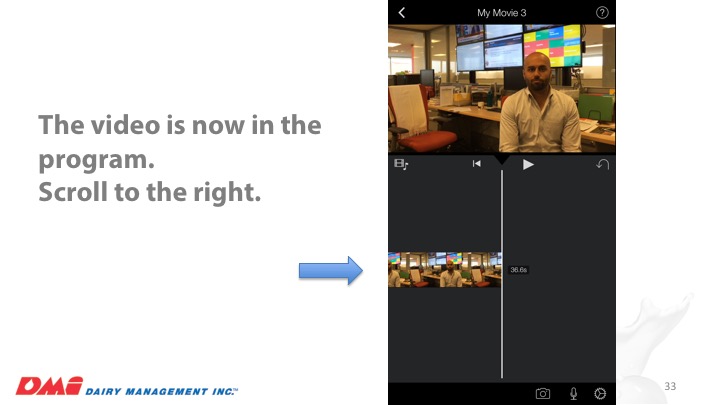
Scroll all the way to the right. Hit the “Play” button to watch the movie play.
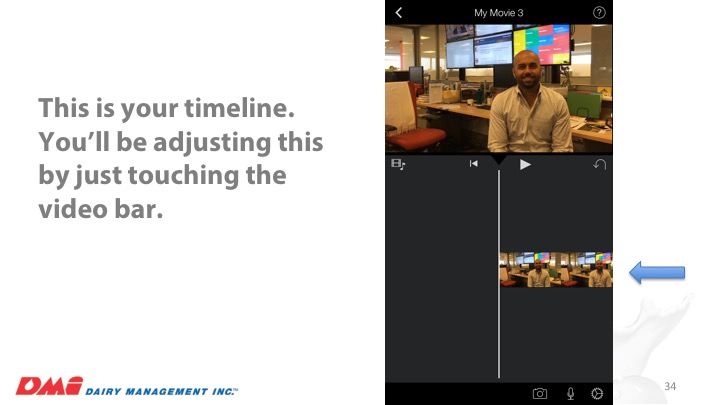
Where the arrow is pointing is your timeline – touch the video and it will highlight in yellow.
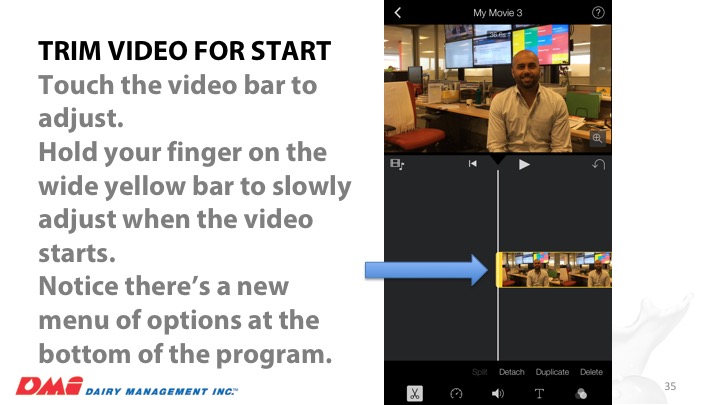
Trim the video bar by touching the video and dragging the thick yellow bar over. You’ll also notice an option menu at the bottom of the program.
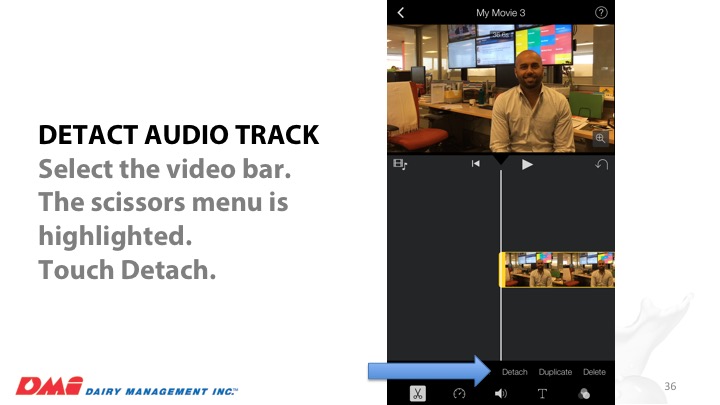
With the video highlighted, select the scissors icon and then “Detach”. This will remove the audio from the video section. You should see a blue line representing the audio track.
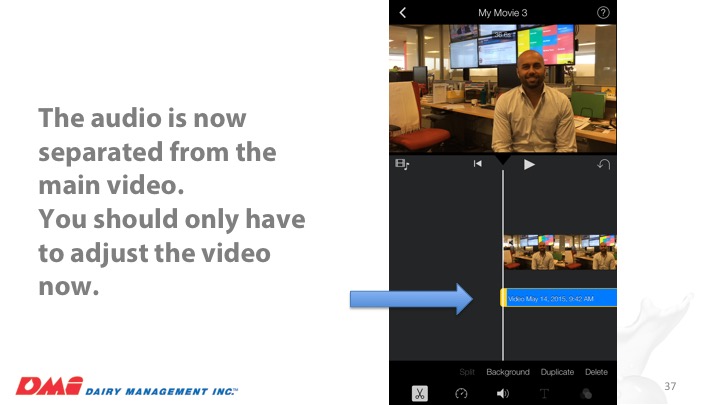
With the audio track separated, you can add what you want to the video track like photos or other B-roll video.
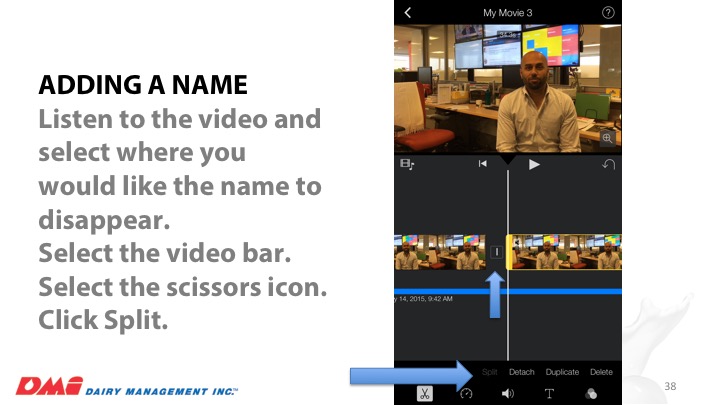
Let’s add a name. Listen to the audio and select where you would like the name to disappear. Click on the video and then click Split.
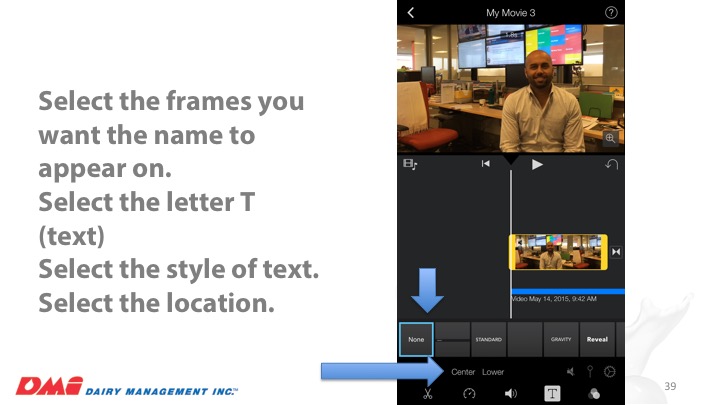
Then you’ll select the frames you’ll want to see the text on. Select the “T” icon and then the style of text action and the location of where you want the text to be. I selected Gravity Style and Lower location.
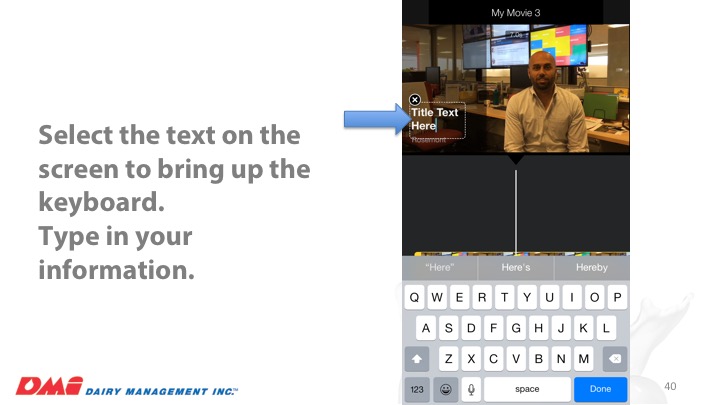
Next you select the text that shows up on the video screen. The keyboard will appear and you can type what you want.
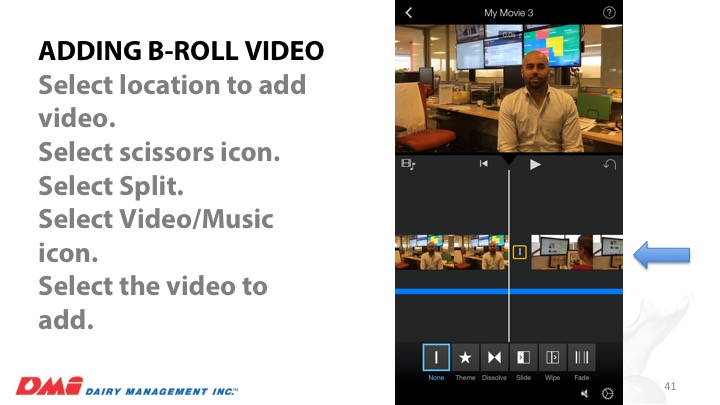
Now we can add B-roll. Select the location to add the video just like you did before. Select the Scissors Icon. Select Split. Select the Video/Music icon and then add the video you want.
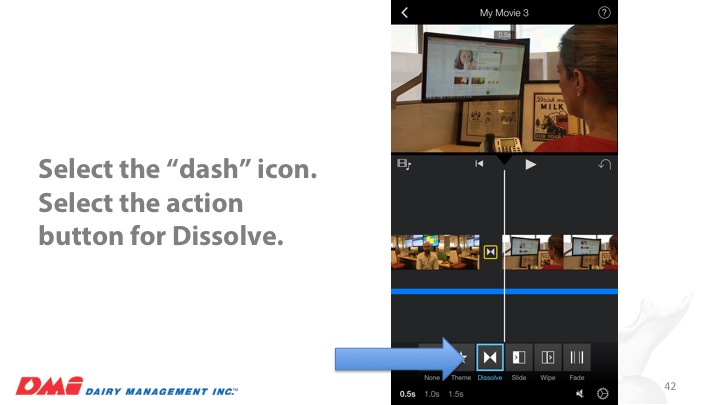
Select the “Dash” icon and then select the action buttons for “Dissolve”. You can pick what you want but dissolve seems to work the best for B-roll.
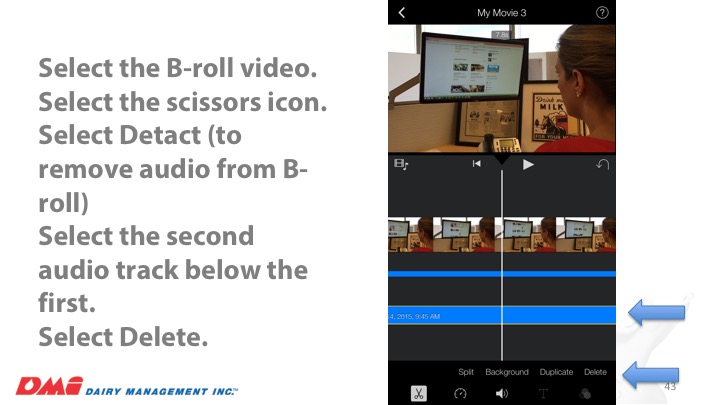
Now we need to remove the B-roll audio. Select the added B-roll frames. Select the “Scissors” icon and then touch “Detact”. Once you have the second line of audio (below your first audio track), select that one to highlight yellow and then touch “Delete”.
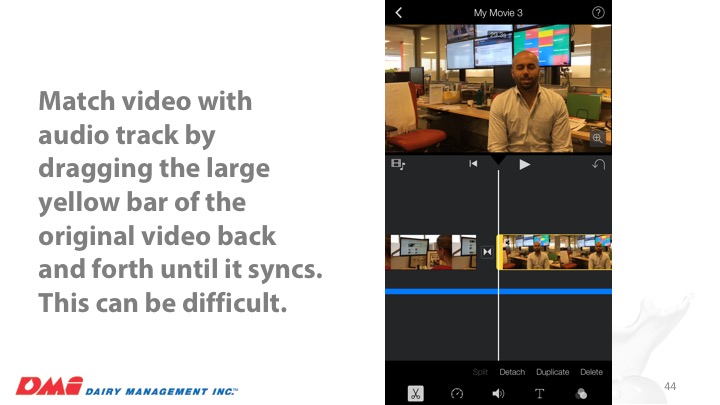
This is probably the hardest part of doing video. You need to match the audio track and the video by dragging the video track of the frames after the B-roll. This will take some time with trial and error. CHEAT TIP: You can scroll back and forth from the end of the video to where the B-roll is and trim the video so that the end of the video matches.
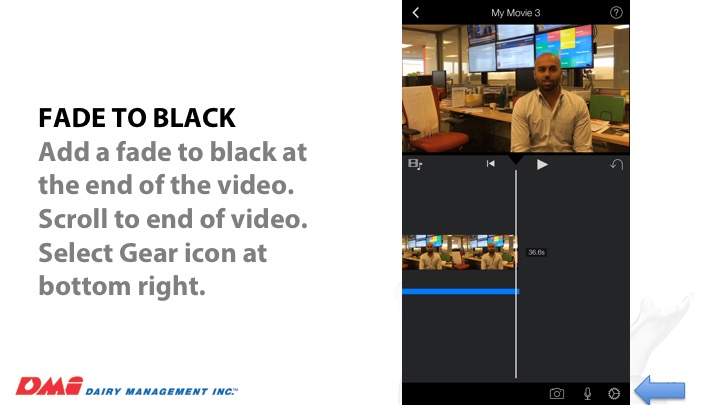
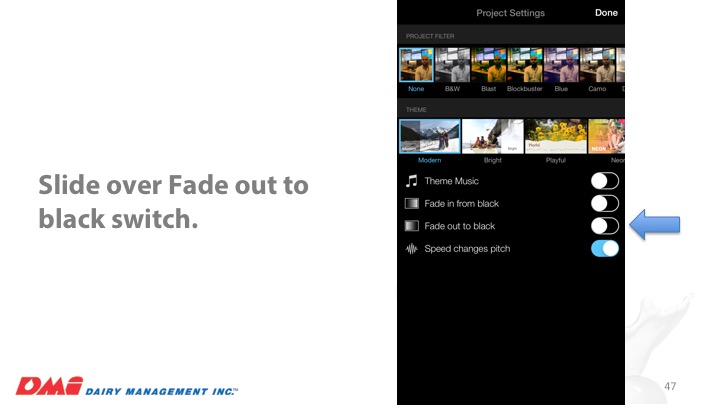
We’re almost done. Now let’s add a “Fade-to-Black” at the end of the video. Scroll to the end of the video and select the “Gear” icon at the bottom right.
Pretty simple. Just slide the switch for “Fade-to-Black” over.
Now let’s name the movie. Select the left arrow to go back to our project name. Select the text in the center and it will bring up the keyword. Delete the fake movie name and type what you want.
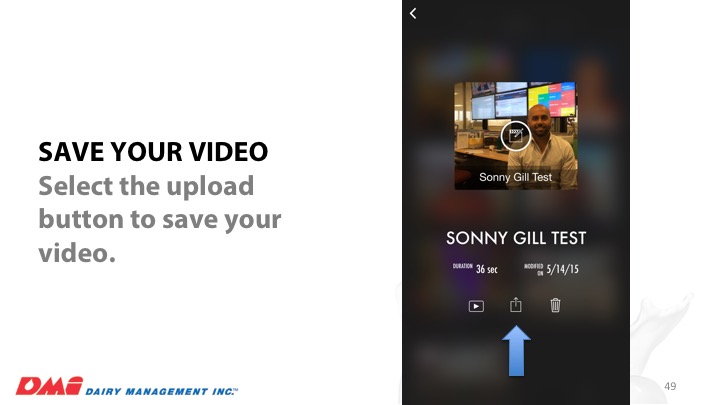
Save your movie by touching the upload button.
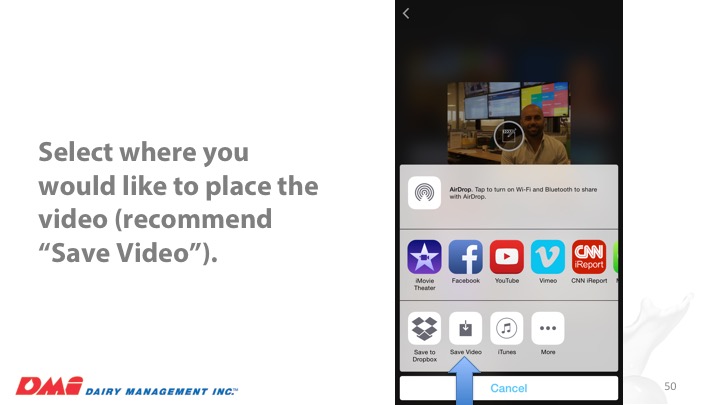
Select where you would like to place your movie. I always save to the phone first.
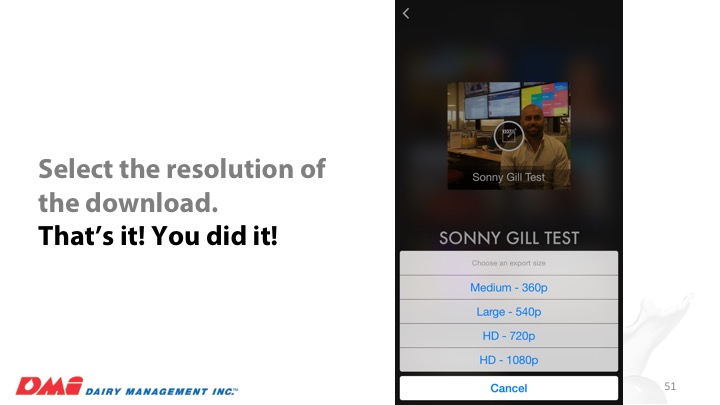
Select your resolution and Ta-Da, your video is done. I would recommend saving anything worth keeping to higher resolution. Quick videos that aren’t keepsakes can be just large format to save space.
That’s it. If you have any questions or need some clarification I would be happy to help. Just leave your questions in the comments or you can hit me up on social media.

Leave a Reply