First, what is Facebook and why would you care to use it?
Facebook is the world’s largest social networking website – it connects over 1 billion people (1.26 billion October 2013). In the US, the numbers are smaller but daily active users are at 128 million people or 36.5% of the US.
Facebook makes it easy for you to connect with family and friends as well as your customers. You don’t need to know how to code to put up photos and videos or just tell everyone what you are doing or how you are feeling.
Facebook is another way to be found online as people search for you and your business. Having an active profile (your digital representative online) can keep you connected, feed you the news that you think is important as well as what your friends think is important, and let you learn what others think about farming, agriculture, your business and their food.
There are other great features like joining topic groups, chatting with friends, emailing with customers and playing games or using applications.
So are you ready to set up a profile for yourself?
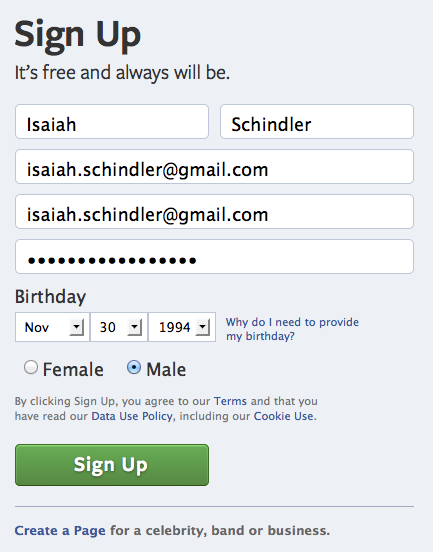
0. Sign Up Page
You can create an account for free. All you need is your email address and a digital photo or two of yourself. It’s going to take a few minutes to do but it’s really easy.
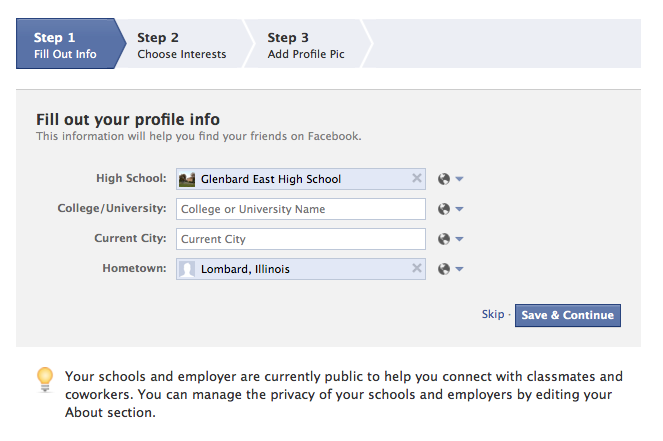
1. Fill Out Info
This is pretty self-explanatory. Facebook would like you to fill in your schooling. Why do they do this? This helps them find people that you may know already.
So if you say you went to school like me at St. Vincent High School from 1984-88 then they will find people in Facebook already that have that on their profile. Same with college or the Armed Forces.
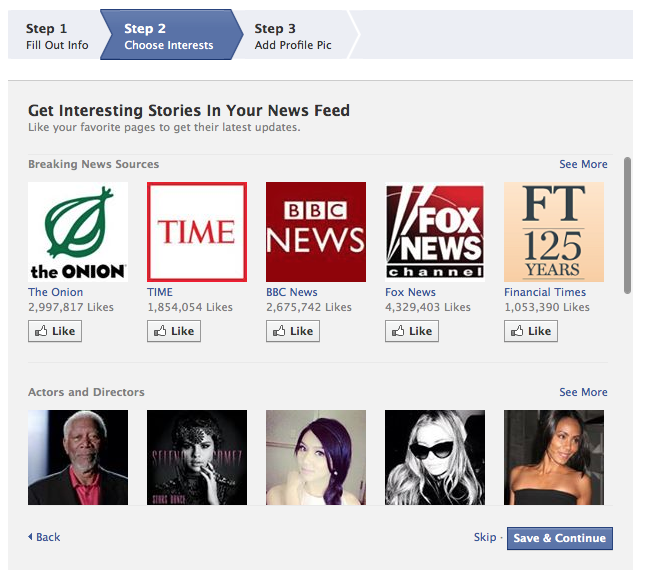
2. Choose Interests
This is how you can begin to build your newsfeed. Now I would recommend skipping this step. Why? Because these Facebook Pages will definitely fill your newsfeed up fast.
I would rather skip this and then go back and add Facebook Pages (after I teach you how to set up Interest Lists for these pages vs. your Newsfeed). So skip it. Or not. Your choice.
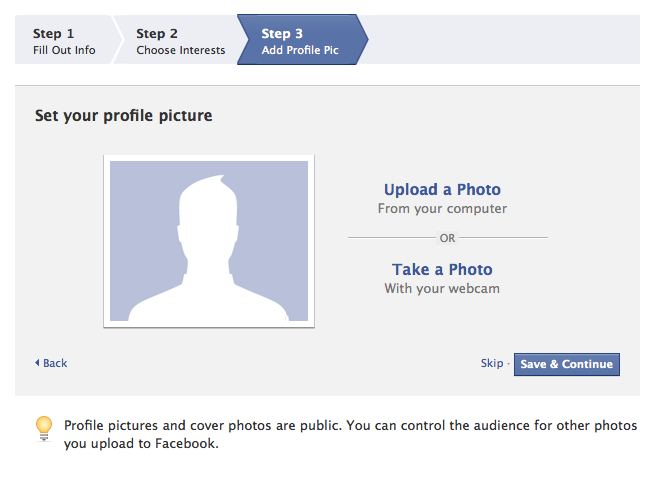
3. Add Your Profile Pic
I always recommend using your face to start off with. Now there’s no reason you can’t have fun with your profile picture down the road but to start off with it, it should be you and you should be able to be recognizable.
You’ll be able to crop the picture if need be using Facebook’s tool. The size is 180 by 180 pixels but it will shrink up quite a bit in the comment section of the newsfeed – I believe that it will be around 25 by 25.
If you would like to manipulate your photo, there are several free photo tools like picmonkey.com or autreplanete’s social media image maker.
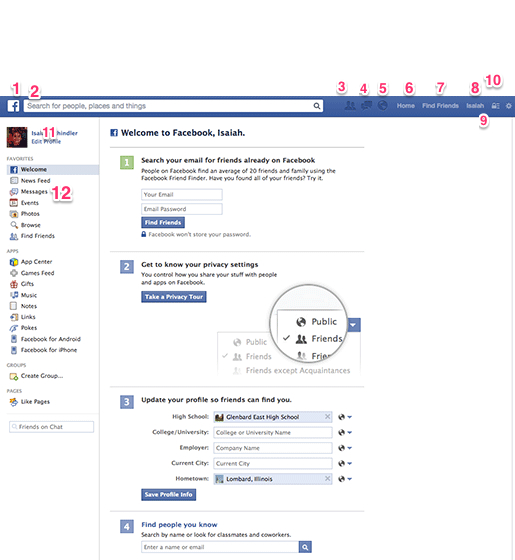
4. The Welcome Screen
This is not what you’ll see when you come back into Facebook. Essentially they are just trying to show you how to find friends, privacy settings (which will we go over in detail in another part of Facebook 101, how to update your profile, etc…
1. Facebook Logo – this will get you back to the newsfeed.
2. Search Box – this will help you find Facebook friends (people), Pages (places or things), Groups (people hanging together on topics) or Events (events you may have signed up for or want to sign up for). This is also a Search Graph which allows you to search for multiple things at once like “People who like” etc…
3. Friend Notification – this will have a number by it if you have Friend Request.
4. Email Notification – this will have a number by it if you have emails waiting that you need to read.
5. Newsfeed Notification – this will have a number by it if you have newsfeed notifications. A newsfeed notification is if you posted something and someone commented on it or if you have tagged people to be notified if they have posted on their wall or if you’ve been tagged in another person’s post. Notification try to keep you aware of activity within Facebook.
6. Home button – same as the Facebook logo on the left side.
7. Find Friends – this is available only in newer profiles. Once you add friends, this will disappear over time.
8. Your Name – This will take you to your profile page.
9. Privacy Shortcuts – this will take you to a quick FAQ drop down of privacy and security issues.
10. Gear – This will drop down will allow you to do several things like change from your profile to a Facebook page (if you control one). You can see how to create and manage advertising on Facebook. This will allow you to create and manage applications (if you have that set up). Then it gets you to your Account and Privacy Settings. We will go through those in detail in another post. You can also Log Out, get Help or Report a Problem.
11. Profile Pic, Name – this will take you to your Profile Page. Edit Profile link will allow you to edit your profile page.
12. Navigation Bar – This navigation will allow you to do many things in Facebook.
This bar will change over time as you start to use different application and products within Facebook.
Under Favorites
Facebook Tip – if you want to add or remove a navigation link under the favorites section – just roll over the link and you’ll see a little pencil pop up to the left. Click on the pencil and it will ask you if you want to remove from Favorites or just Rearrange the Order.
- Welcome – this link will take you to the page you see here. This will disappear after you’ve been using Facebook for a while.
- Newsfeed – this link will take you to your main newsfeed where you will see what your friends and liked pages will be posting.
- Messages – this link will take you to your Facebook email system. There will be a number here of how many messages you have in your inbox.
- Events – this link will take you to the Events page. It will show if you have any Invites from other Facebook Friends and also display a calendar of Events that you and your Facebook Friends are attending. It will also show you all the upcoming birthdays of your Facebook friends. A number will appear next to the link to showcase the number of invites you need to respond to.
- Photos – this link will take you to your photo section.
- Browse – This link will take you to search and allow you to find more friends. Mine took me to a search of friends who are from my hometown and now live near by me in Chicago.
That’s it for now. In the next post (Part 2), I’ll go through the Privacy and Account Settings.
Did I miss anything? Do you need more explanation about a specific part?
Leave a Reply