Finally, now we are to the best part. Here’s where you get to talk back and forth with people through the tool itself. If you landed here and didn’t catch the first parts of Facebook 101 – here’s Part 1, Part 2 and Part 3.
The status update (located at the top of your newsfeed) allows you to write to others about what you are doing, feeling, seeing, touching, whatever you want.
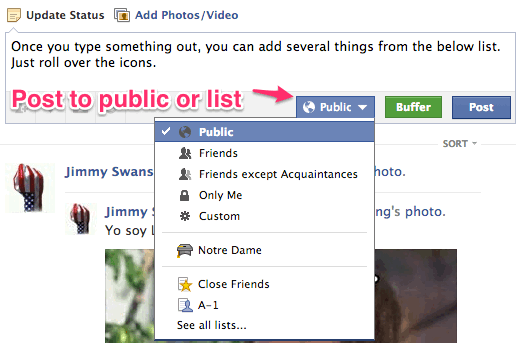
These statements, called “posts”, can be sent to the entire public (your friends can see them on their news feeds and it can also be seen by their friends – friends of friends if your friends comment or share the post) including the public search on Facebook. I’ll explain how you can set who sees your posts.
Let’s go through the process of posting a status update.
1. The Standard Text Status Update
All you have to do is write into the text area. It’s as simple as that. When you hit “Post”, it will go onto your Timeline and your friends will see it on their news feeds.
TIP – Not every update you post will be seen by all of your friends. There’s an algorithm that determines the visibility of your post. The more shares, comments and likes – the more visibility a post will get.
2. Adding Photos or Video
If you click, “Add Photos/Video” you will be able to add one or more photos (into a Photo Album) or you can add a video.
TIP – Photos and videos get the most shares, comments and like on Facebook.
When you add a photo, you’ll be able to “tag” people in the photo so they will be able to see that you added a photo of them.
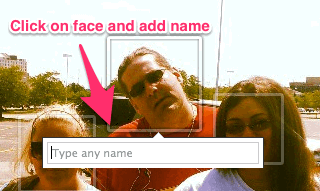
Simple point and click on the face and it will bring up your list of friends (or search for your friends), then select them. They will be notified that you have tagged them in a photo.
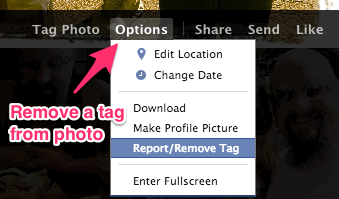
TIP – If you don’t want to be tagged in a photo, simply go to the photo and remove yourself from it.
3. Status Icons
Below the Status Update, you’ll see a row of icons. With these you’ll be able to add information to your Status Update.
When you select the blank face icon, you’ll be able to say you are “with” one of your Facebook friends.
When you select the map point icon, you’ll be able to select the Facebook page or location of place.
When you select the photo/video icon, you can add a photo or video to the post.
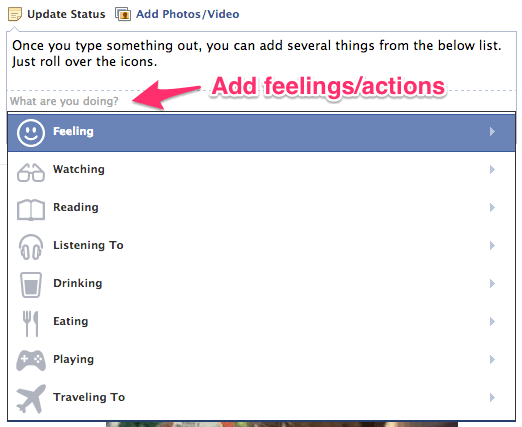
When you select the emoticon, you will be able to add an emotion or common action.
TIP – Drinking milk/chocolate milk or eating cheese, yogurt or ice cream are very common actions and you can help out the industry by letting people know you are consuming our great products.
4. Tagging Individuals
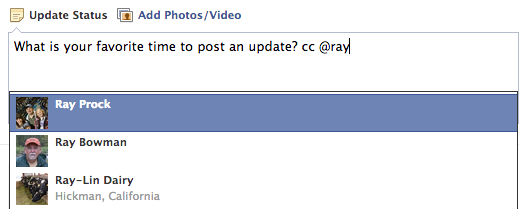
If you want someone to know that you are talking about them or to them in one of your updates, than all you have to do is to the “@“ sign and it will allow you to tag the person in a status update.
They will be notified of the status update as well.
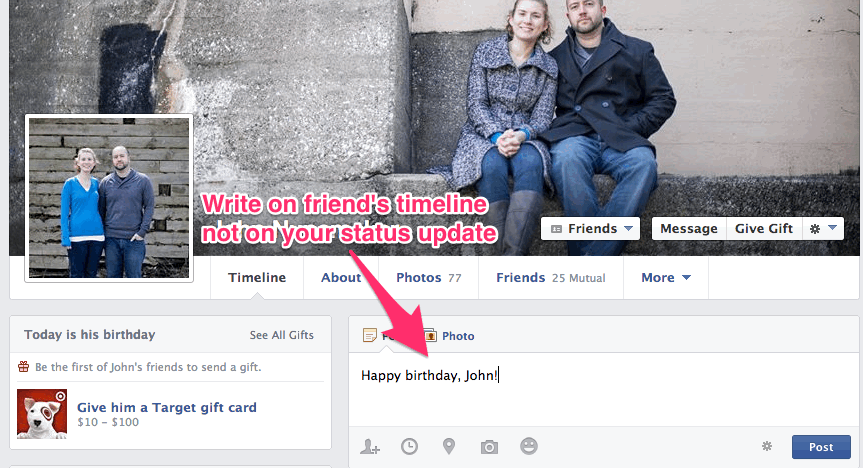
TIP – If you want to talk privately with someone, use the Facebook Messages system (just like email). If you want to say Happy Birthday or Congrats to them, then go to their page and post directly on their timeline. This notifies them as well. I’ve seen many people post on their own timeline and not tag the person or not write on their timeline, and the person never knows you were talking to them.
BONUS TIP – Use hashtags to reach new people
Will Gilmer of Gilmer Dairy uses the hashtag #dairy to reach people who may be using Facebook’s hashtag search to find out more about what people are talking about when they talk about dairy. Don’t use more than three hashtags per post.
That’s about it to status updates. In the next post, I’ll talk about what you should be posting (not just how to do it.)





Leave a Reply